As discussed in last article we will Test customization using web services that we developed this week for integration from #msdyn365bc or #MSDynNAV.
If you want to see other articles in this series please refer here.
We will need to use same website to Test this process. This process will require a Base64 Value for testing.
Open Business Central and search and open Web Services Page.
Click on New, and add a new page (50002) that we created for API and name it attachmentwebservices.
If you have read the first article on this series, please download and Install Postman.
In Postman client, select New.
Let's try testing is GET Process. Select Get and then Paste URL in the field "Enter Request URL".
Then Select Authorization tab and select the appropriate Type of authentication. For Docker Environment I will select Basic Auth and key in username and password that is required for client connection.
Then Click Send and you will see Response in below tab as shown below. The Response will have fields which are available in page which in our case will have -
- Id will have the ID stored in the record.
- code will have the code stored in the record.
- Extension will have the file extension for the file that use input during add record.
- outbit64value will have the converted Bit64 value for the attachment stored in database.
In this case we will try to import/upload a pdf file. For that first we will get the bit64 value using Bit64 Guru website (as shown below).
We will copy the Bit64 value for the PDF and then open Postman again.
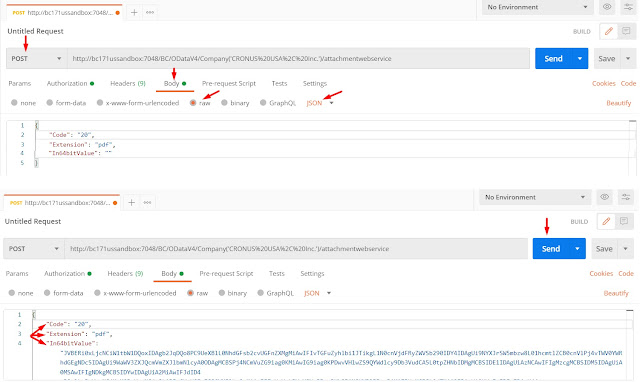
Choose -
- Post. to add new record.
- Request URL to add URL that we have from webservice page.
- Select Body - raw - Json to add details of Record.
In next article we will start testing the customization using API.
If you would like to access the source code please refer GitHub.
Saurav Dhyani


Comments
Post a Comment