 Hi Readers,
I am getting so many questions about Unable to download symbols in the Visual Studio Code, so I decided to write an article to talk about all the steps to download symbols correctly.
Thanks to +Dinesh Marne for this article.
Let's walk through all the steps that we need to make sure before using VS Code.
1. To start with, we need to make sure the latest update of Visual Studio Code is installed.
You will either get a notification in Visual Studio code or you can force to download the latest update using Help - Check for Updates as shown below.
2. Next, we need to make sure that the latest version of AL Language Extension is installed.
As of today (10/25/2019), the latest version is 4.0.176004.
3. After these two steps Restart your Visual Studio Code either manually or using Cmdlet Developer: Reload Window.
4. Make sure that Service Tier has Enable Developer Service Endpoint Enable in Development Tab.
Restart the Service after you set this parameter.
5. Next is to Create a New AL Extension Project using AL:Go!
6. After Specifying the Folder, the next menu to Select the Target Platform is Very Important.
Select Right Target Platform -
4.0 - for Business Central 2019 release wave 2 - Business Central Version 15.
3.0 - for Business Central 2019 Release - Business Central Version 14.
2.0 - for Business Central Fall 2018 Release - Business Central Version 13.
1.0 - for Business Central Spring 2019 Release - Dynamics NAV Version 2018.
** Target platform decides configuration for app.json, which can be changed manually also.
7. Once Selection is complete, select server either Sandbox (if connecting to Cloud Sandbox) or own server (if connecting on-prem).
8. The system will not ask for username and password. If you are using windows autentication then click Escape.
9. The system will generate Launch.json and app.json which we need to update to download symbol correctly.
10. Update Parameters in Launch.json.
- Server Instance - Name of Service that you created During Installation.
- Authentication - They way you configured to authenticate to Server.
- Port - Specify the Development port that you specified during installation. Check Step 4 image and look for port number in the development tab.
You don't need to change/update any other parameters.
11. Last but not least, let's have a look in app.json.
If the target platform is selected correctly all the parameters will be correct. The following parameters are set correctly for each version.
11.1 - For Business Central 15 mandatory parameters -
- "dependencies": [System Application & Base Application]
- "platform": "15.0.0.0"
- "runtime": "4.0"
11.2 - For Business Central 14 mandatory parameters -
- "platform": "14.0.0.0"
- "application": "14.0.0.0"
- "runtime": "3.0" or "3.2"
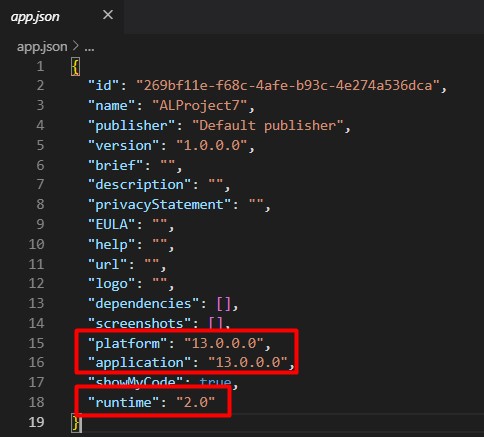
11.3 - For Business Central 13 mandatory parameters -
- "platform": "13.0.0.0"
- "application": "13.0.0.0"
- "runtime": "2.0"
11.4 - For Dynamics NAV 2018 mandatory parameters -
- "platform": "11.0.0.0" (Manually changed)
- "application": "11.0.0.0" (Manually changed)
- "runtime": "1.0"
Now try downloading symbol using the command AL: Download symbols -
This should download symbols based on the version of Dynamics NAV or Business Central.
I hope this clarifies all the doubts. If not please update the comment to this article. I will update articles after comments.
Regards,
Saurav Dhyani
www.sauravdhyani.com


Thank you very much sir,for valuable information.
ReplyDeleteThanku so much sir,It is really helpful for me.
ReplyDelete